/Marketing/LOGO/Horizontal%20Logo/Color/SMARTGYRO%20H_LOGO%20RGB.png?width=525&height=128&name=SMARTGYRO%20H_LOGO%20RGB.png "logo")


Connecting your chartplotter or multifunction display (MFD) to your Smartgyro stabilizer makes it easier than ever to monitor and control your stabilization system. Rather than switching between multiple displays, boaters can manage Smartgyro alongside other onboard systems, creating a more streamlined and intuitive helm experience.
Key Benefits of Connecting Smartgyro to an MFD
-
Save valuable bridge space – The dedicated Smartgyro display can be installed close to the stabilizer for easy maintenance and local control, while the MFD provides full operation and monitoring directly from the helm.
-
Centralize onboard control – Modern boats increasingly rely on a single interface to manage onboard equipment. With Smartgyro, boaters can monitor and control up to three stabilizers directly from a compatible MFD.
-
Real-time monitoring – View stabilizer status, operating information and alerts without leaving your primary navigation display.
How Does Smartgyro Connect to a Chartplotter?
Smartgyro can be connected to compatible chartplotters and multifunction displays via Ethernet using the HTML5 protocol. This solution provides a simple, user-friendly experience and is compatible with all major MFD manufacturers. In this configuration, the stabilizer is controlled through an application running on the MFD, meaning the app must remain open while monitoring or operating the system.
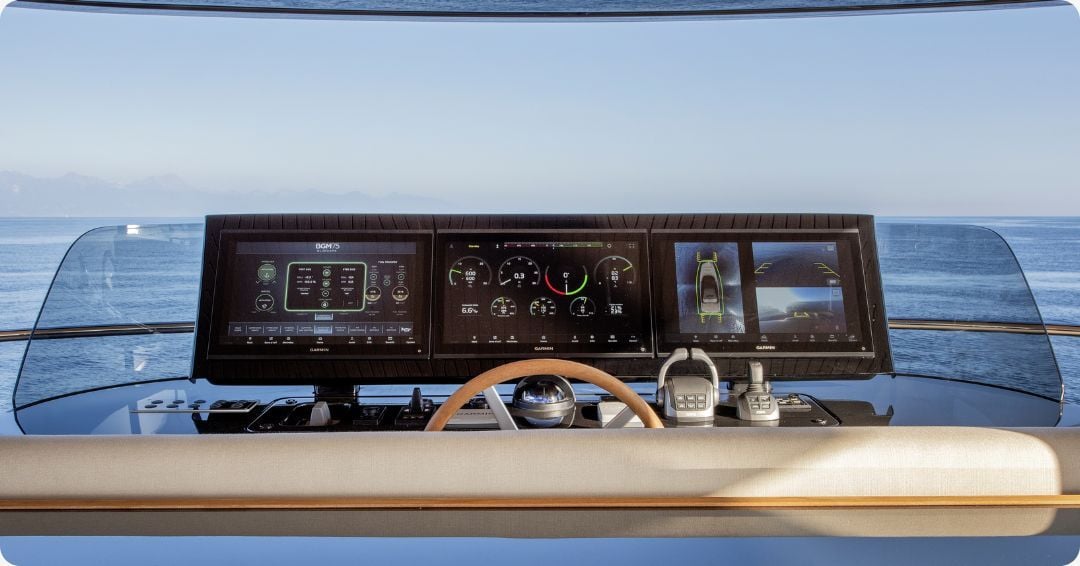
For a fully integrated experience, Smartgyro also supports MFD developers with integrating the SG CANBUS communication protocol. This enables direct communication between the stabilizer and the display, allowing the chartplotter to function as a dedicated Smartgyro control panel. Because the connection remains active, critical alarms are displayed instantly as pop-up notifications on the MFD, helping ensure important alerts are never missed.
Compatible MFD Manufacturers and how to connect
Raymarine
- Axion and Axiom 2 with LightHouse 4 v4.6.42 or later.
Connect the Smartgyro using the Ethernet expansion cable (P/N 6100CA0039, length 2m). A RayNet (F) to RJ45 (F) adapter (Raymarine SKU: A80247) may also be required. It is also possible to use a RayNet (F) to RJ45 (M) cable and a female-to-female ethernet adapter.
- Turn off all displays in order to operate safely.
- Connect the Ethernet expansion cable (P/N 6100CA0039) to the Smartgyro Control Display port number 3, on the back on the unit.
- Connect the RayNet (F) to RJ45 (F) adapter to the Raymarine MFD Network port.
- Connect the two cables together directly, or through an extension cable if necessary.
- Power on the displays and wait until they are ready to operate.
- Verify the Smartgyro icon appears between the available applications in the Raymarine MFD dashboard.
Garmin
- GPSMAP 9000 series
- GPSMAP 8400 / 8600 series
- GPSMAP 8700 (black box)
- GPSMAP 7x3 / 9x3 / 12x3 / 16x3 / 15x3 series
- GPSMAP 7x2 / 9x2 / 12x2 PLUS series
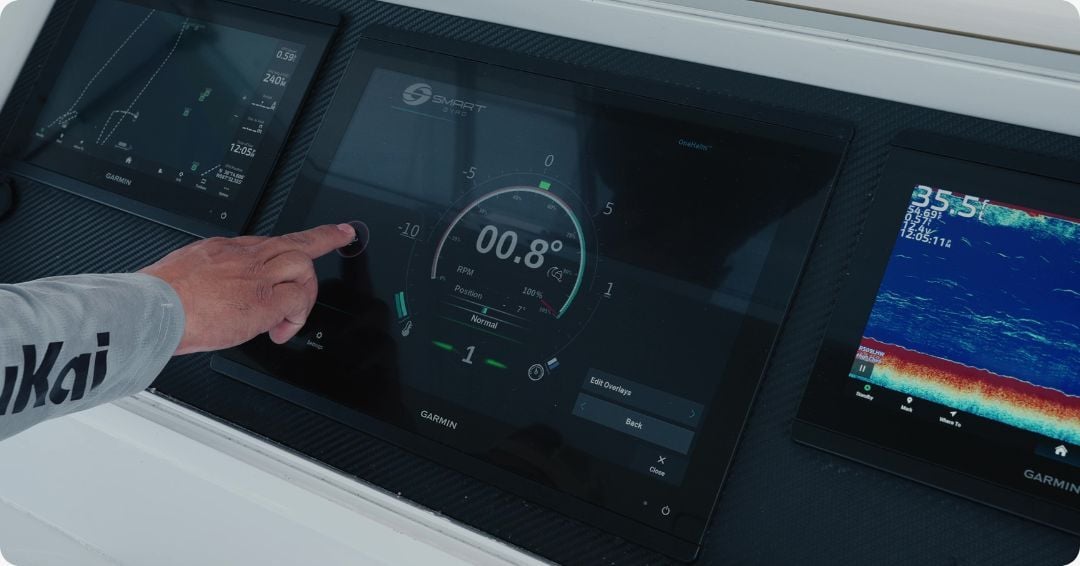
Connect via the Smartgyro Ethernet expansion cable (P/N 6100CA0039).
No additional adapter is required for Garmin Marine Network displays. BlueNet-equipped Garmin units require the Garmin RJ45-to-BlueNet adapter (Garmin P/N 010-13094-00).
- Turn off all displays in order to operate safely.
- Connect the Ethernet expansion cable (P/N 6100CA0039) to the Smartgyro Control Display port number 3, on the back on the unit.
- Connect the RJ45 end of the Ethernet expansion cable (P/N 6100CA0039) to the Garmin MFD, either directly or through the use of an Ethernet extension cable (if necessary). In case the Garmin MFD supports BlueNet, the specific adapter is necessary, otherwise the connection can be performed directly with the Network port.
- Power on the displays and wait until they are ready to operate.
- Verify the Smartgyro icon appears between the available applications in the Garmin MFD menu.
Simrad
- NSS evo3 and evo3S
- NSS4
- NSO evo3 and evo3S
- NSX series (NSX 3007 / 3009 / 3012)
- NSX Ultrawide
- NSX, IDS, GO7 XSR, GO9 and GO12 series
Lowrance
- HDS Pro, HDS Live, HDS Carbon, Elite FS series.
B&G
-
Zeus/3S Glass Helm, Zeus/3S, Zeus S, Vulcan 7R, Vulcan 9, Vulcan 12 series.
To connect, use an ethernet adapter cable 5P (M) to RJ45 (F) (Lowrance/SIMRAD SKU: 000-0127-56). Alternatively a connection can be made via Smartgyro though an ethernet expansion cable (P/N 6100CA0039, length 2m).
For NAVICO: Ethernet adapter cable 5P (M) to RJ45 (F) (Lowrance/SIMRAD SKU: 000-0127-56).
- Turn off all displays in order to operate safely.
- Connect the Ethernet expansion cable (P/N 6100CA0039) to the Smartgyro Control Display port number 3, on the back on the unit.
- Connect the Ethernet adapter cable 5P (M) to RJ45 (F) adapter to the NAVICO MFD Network port.
- Connect the two cables together directly, or through an extension cable if necessary.
- Power on both the displays and wait until they are ready to operate.
- Verify the Smartgyro icon appears between the available applications in the NAVICO MFD dashboard.
For all manufacturers, when launched, the Smartgyro application presents a graphical interface identical to that of the Control Display provided with the gyro stabilizer. As a result, use of the application is identical to that described in the Operating Manual.
Is Smartgyro-MFD Integration Easy to Set Up?
Yes. Smartgyro's Ethernet-based integration has been designed to be quick and straightforward.
Once the Smartgyro display and the MFD are connected to the same network, there is no need to perform any other action. The system automatically detects compatible displays and adds the Smartgyro icon to the list of available applications.
Below an example on Raymarine Axiom display..jpg?width=900&height=472&name=Smartgyro%20App%20icon%20on%20Raymarine%20Axiom%20MFD%20(2).jpg)
Fabrizio Stifani, Smartgyro R&D Manager, commented: “We're proud to collaborate with some of the marine industry's leading brands to ensure more boaters than ever can experience the benefits of Smartgyro technology. As we continue to expand our network of navigation partners, accessibility will be further increased, giving more boaters the opportunity to enjoy a smoother, safer and more comfortable time on the water.”